
A week-long event called “Reimagine End of Life” is taking place in San Francisco right now. As a part of this, Carol and Ms. M. will offer a workshop on Saturday called “It’s a Wrap: Design Your Own Burial Shroud.” The point of the workshop is not to make the actual shroud you’re going to be buried in, but to start thinking about a design for something that you’d like to be wrapped up in after you die.
Tonight, Carol and I decided to play around with some materials and try a few things out. So we went down to Joanne Fabric and got 3 yards of 90 inch-wide unbleached cotton muslin, and a couple dozen different colored fabric markers. We wrapped Carol up in the muslin to see how much cloth was needed, and discovered that 2 yards of 110 inch fabric worked. (But if I were to do this again, I’d use a 90 inch square. And if I were making one for myself — Carol’s five foot nine inches tall, but I’m six foot five — I’d probably want a 110 inch square of fabric.)
Carol lay on the cloth diagonally. I flipped up the corner down by her feet first, folded over one side then the other side, and finally flipped the top corner down over her face. After flipping the corners back down, I used a pencil to make faint lines about where I folded the fabric; then when I started drawing, I knew about where to draw the designs.
Carol wanted to draw a face, but I said that would be far too difficult. Instead, she let me draw an abstract design within an oval shape:
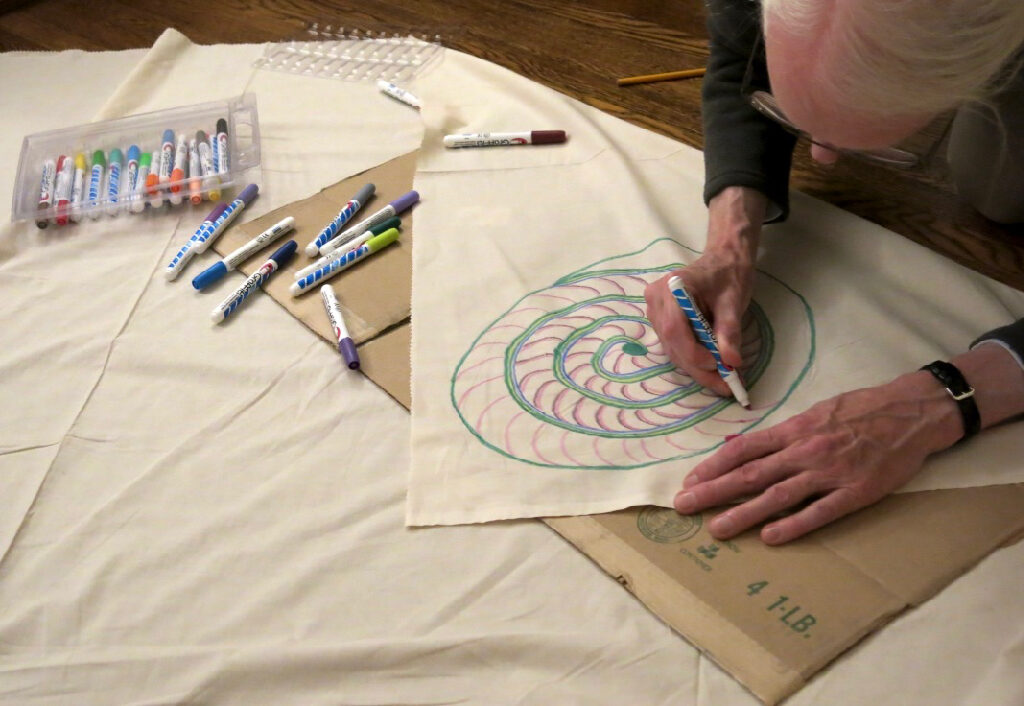
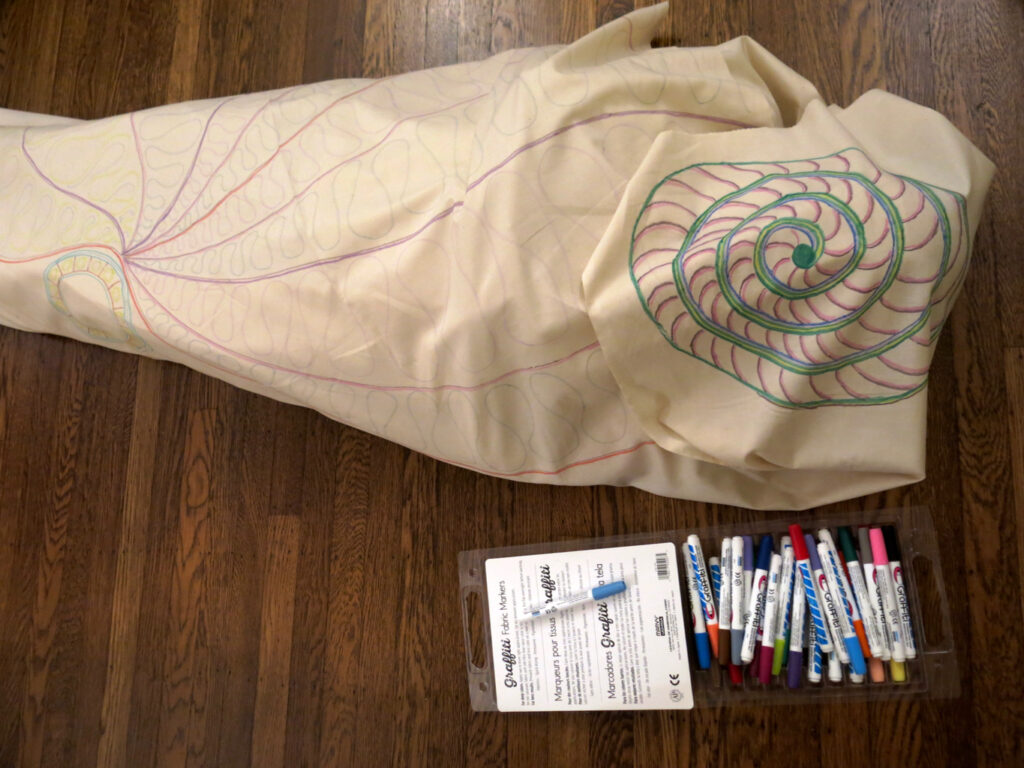
Next I drew a design on the final flap of fabric that would be folded over her body. Ultimately, I suppose you could draw designs over the entire piece of fabric. But most of what would be exposed would be those two flaps of fabric, as you can see in the photograph below:

(That took me about an hour. But I have excellent hand skills, and years of training and experience in making art; someone with less experience could easily take two hours to get that far.)
To complete the shroud shown in the photo, I’d use fabric paint to fill in the design — perhaps a light wash inside the drawing at the head, with a dark bold color outside it; and then a light wash inside and around the swirls in the part over the body. If I wanted a more carefully crafted shroud, I’d get another piece of fabric and hem all the edges, and repaint the design on the hemmed fabric.
Really, though, for me this isn’t about coming up with a carefully-crafted final product. It was very pleasant working with these materials, and it was a chance to reflect on — not on death so much as to reflect on the entire life cycle.
Cost: 90 inch cotton muslin is about US$8 a yard. A nice set of fabric markers is going to set you back $20-35. If you want to use paints, that will cost you about $3 per color (for good-but-not-expensive paints). If you want to try stamping or printing with dyes, expect to pay about $45 for a starter kit.
Registration is closed on the workshop, but if you contact Carol directly ASAP, she might be able to get you in.
Update: 1/13/22 — There are now two requests for this post in come other format (see comments). So I made a PDF version which should be easy to download. Just click on the link above, or the preview below.